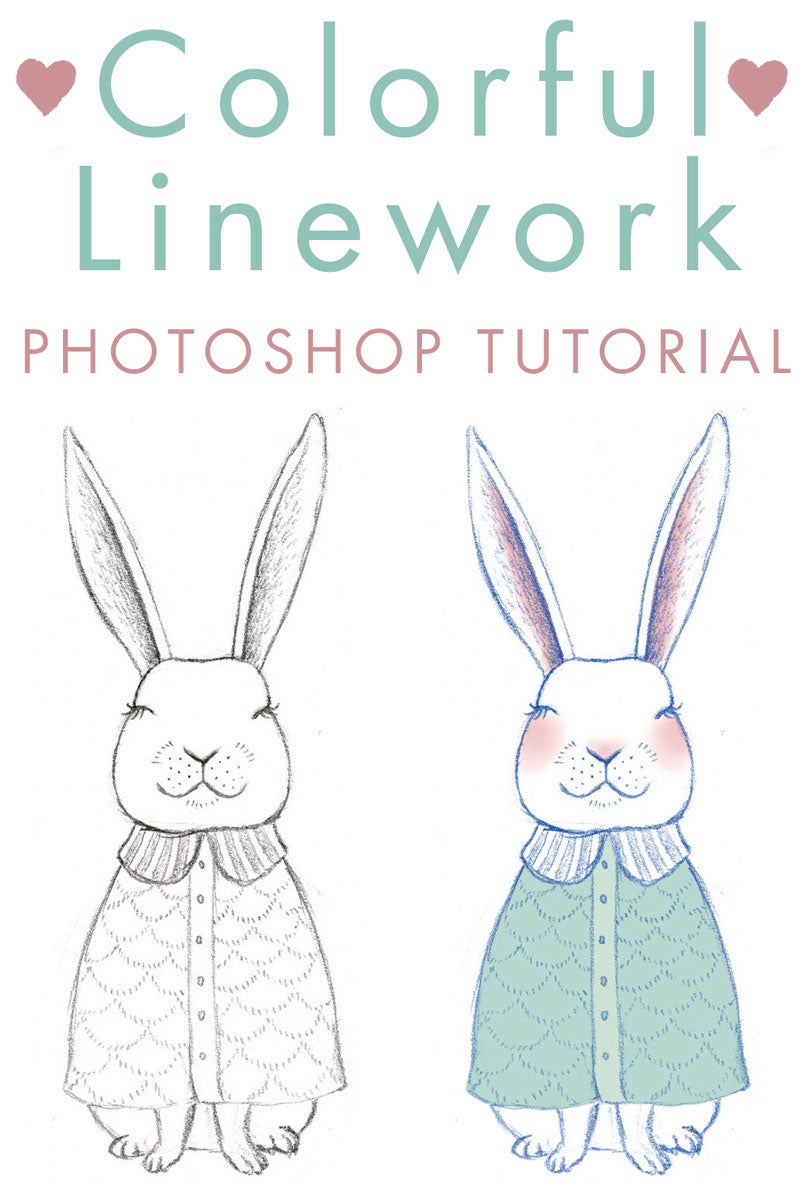
In my quest to "find my style," I've spent a lot of time trying to figure out what I do and don't like in my drawings. One thing I've discovered I like a lot is the sketchy graphite linework in my initial thumbnail sketches, so I'm trying to find ways to bring that into my finished work.
I recently discovered an easier way to bring that into digital work, so I put together a tutorial to share it with you.
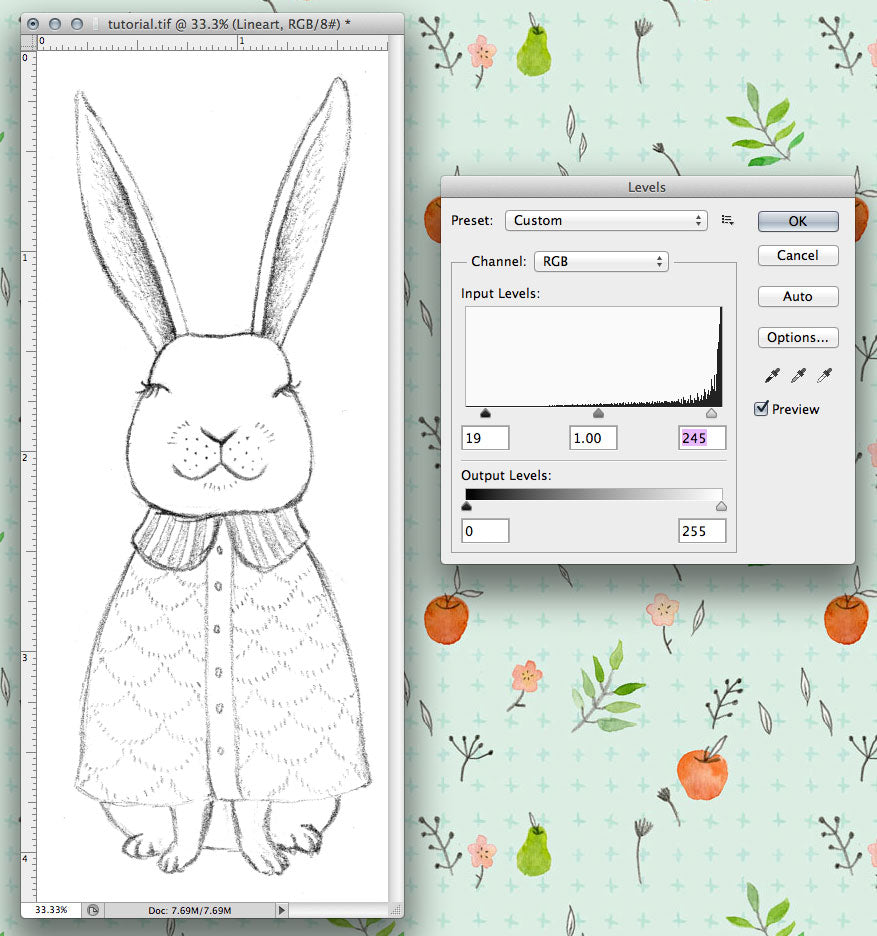
Step 1 Scan your image in grayscale at 300dpi or higher. Open the image in Photoshop and use the Levels tool to make the pencil lines dark and the paper white. Paper texture will show up in your final product with this method, so be sure to eliminate as much of it as you can at this step.

Step 2 Open the channels window. Command+click (Mac) or Control+click (Windows) the thumbnail of the RGB channel to select the lineart. You'll see marching ants appear around your image. This has selected all the white pixels in your image.
Select the inverse by going to Select > Inverse or using Shift+Command+I (Mac) or Shift+Control+I (Windows) to select the black pixels instead.
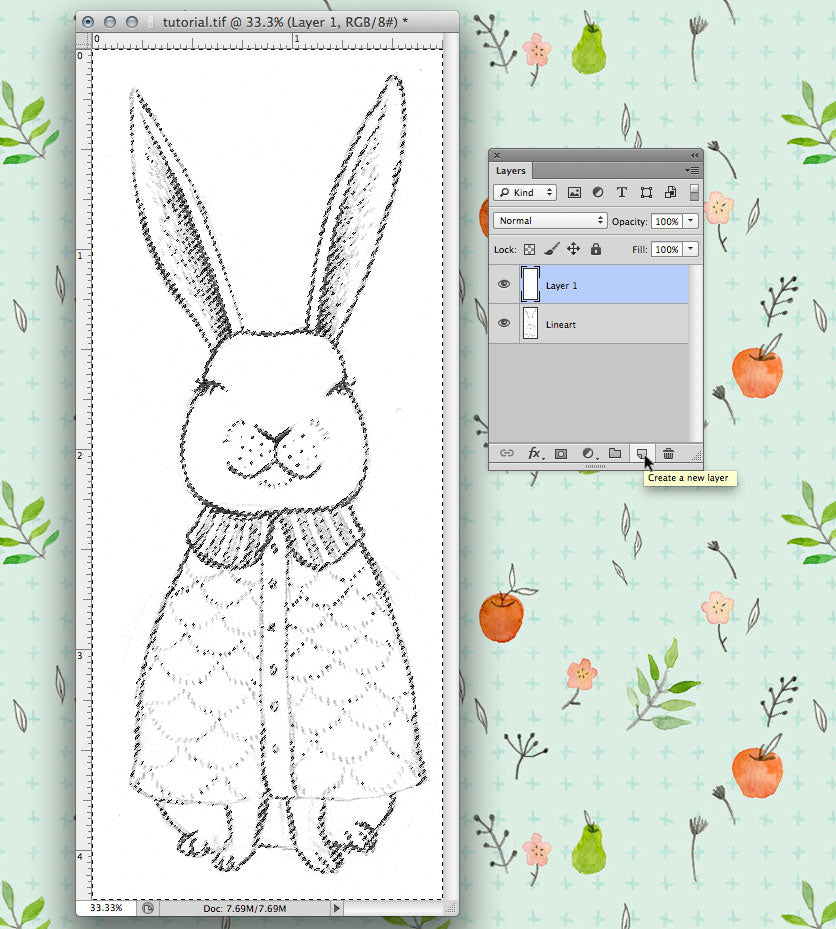
Step 3 Make a new layer above your original image layer. Turn off visibility of the scan layer by clicking the eyeball next to the layer thumbnail.
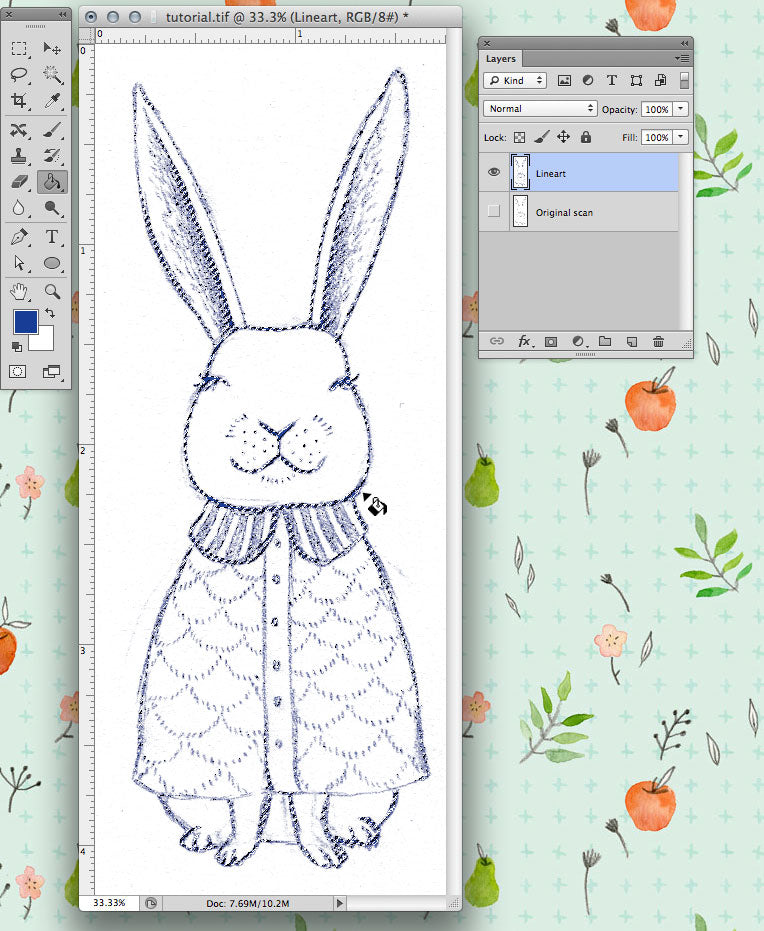
Step 4 Using the Paint Bucket tool, fill the lineart with your desired color. I found that clicking in the selection multiple times with the Paint Bucket gave me a darker color that I liked. You can experiment to see what suits you. As you do this, you can use Command+H (Mac) or Control+H (Windows) to hide the marching ants and better see what you're working on.
Once you're happy with the darkness and color of the lineart, deselect your selection by using Command+D (Mac) or Control+D (Windows).
You can also use the Eraser tool to clean up any extra bits. For instance, I had a cat hair in my scan to erase. Wonder how that got there...
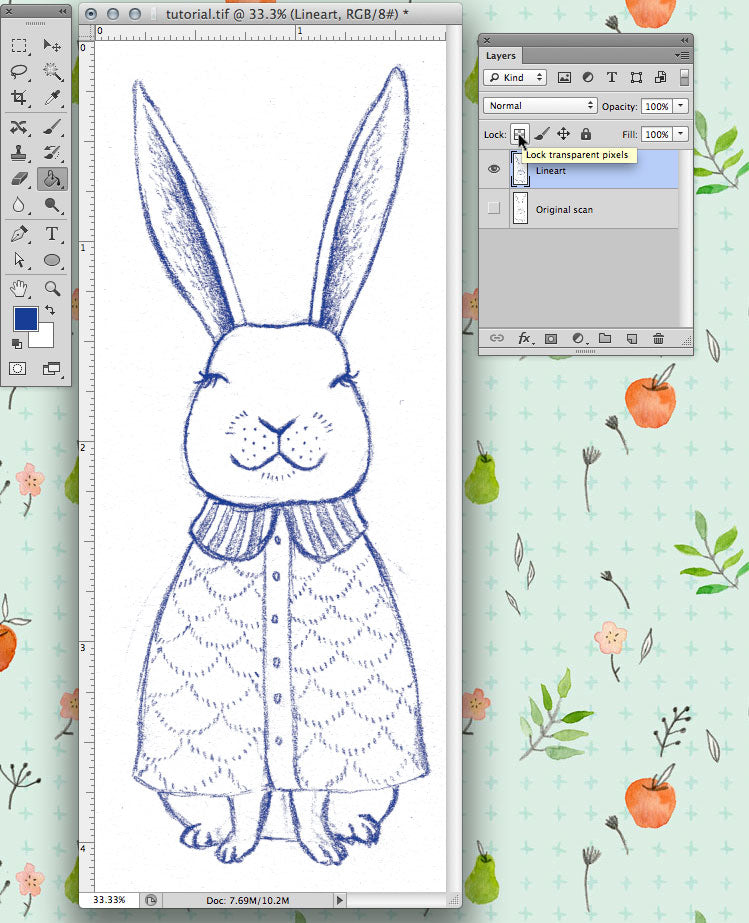
Step 5 Lock the transparency of the lineart layer by clicking the appropriate button in the Layers window.
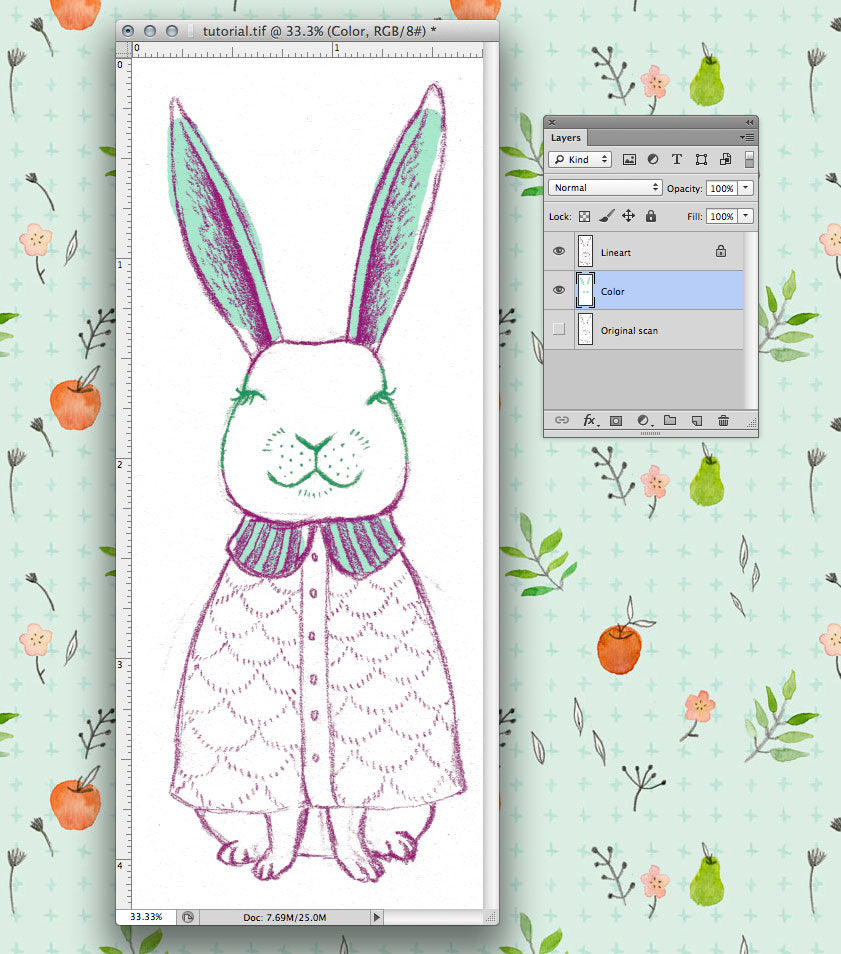
Step 6 You now have a layer with just your lineart and no fill in the background. With the transparency locked, you can use the Paint Bucket or Brush tools to color your lineart. Create a new layer below the lineart to color in your drawing using your preferred brushes or other coloring techniques.
And that's all there is to it. With this method, you can create icons without any background to layer in images in any way you choose. This is a great method for those trying to license designs because it gives the client a lot of options on how to use the icons.
Enjoy!